Step 1
Roll out your artificial grass directly onto your prepared sub-base.
Overlap the rolls by 100mm where you want to join them.
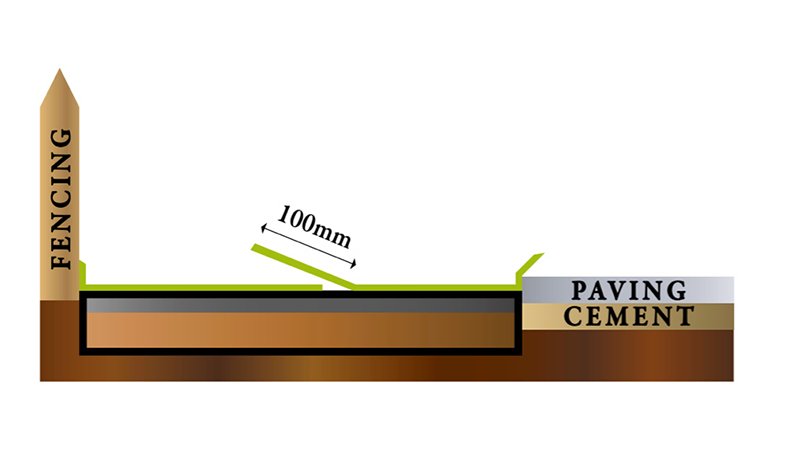
Step 2
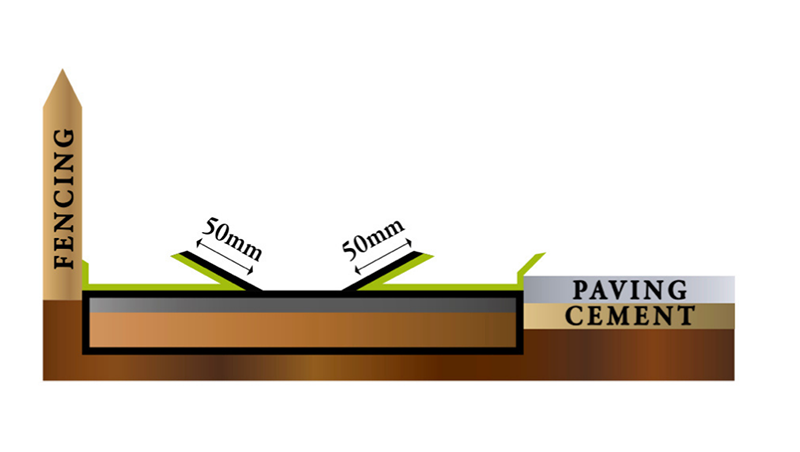
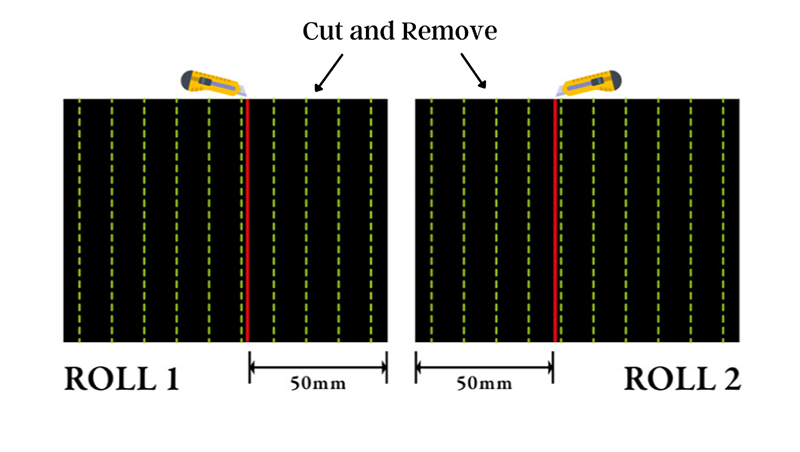
Fold over both rolls of Artificial Grass and using a sharp Stanley Knife, carefully trim 4 stitches (approximately 50mm) off each roll, cutting through the backing material as close to the grass seam as possible for a smooth, straight finish.
Ensure you cut down the entire width of both rolls for an even join.
Step 3
Next, fold the rolls down onto the Weed Membrane & sub-base and position them into place, making sure that the backing materials are not touching.
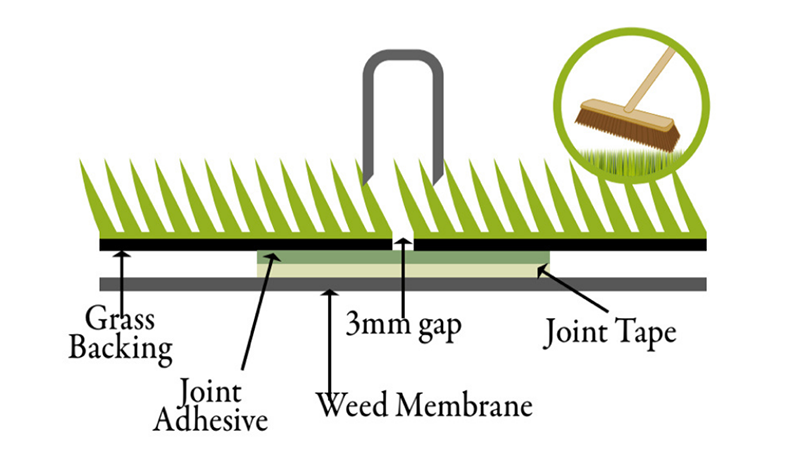
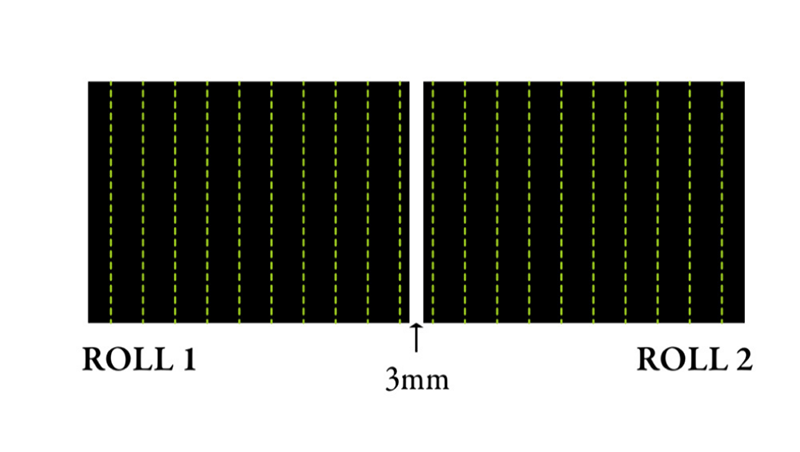
Ideally you need to achieve a 3mm gap between the backing of the two artificial grass rolls all the way down the lengths of the 2 rolls.
The aim is to replicate the same stitch on the existing grass passing from one piece to the next. The rolls too tight together will show a white Mohawk effect down the length of the joint and a gap too wide apart will find the grass dips into a valley creating a darker hollow line.
Step 4
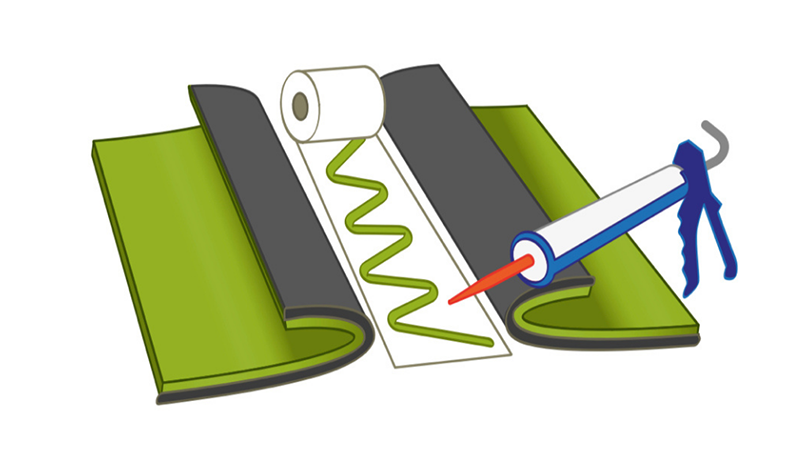
Once you are happy with the positioning, fold back each roll of artificial grass and place a line of joint tape between them – the white side facing up (green side facing down).
Apply a thin layer of artificial grass joint adhesive onto the joint tape using a zig-zag motion.
Step 5
Carefully fold down both rolls of grass, ensuring no blades are trapped underneath and press firmly onto the adhesive to create an invisible seal.
Secure the joined area with artificial grass securing u-pins along the entire length of the join.
Weigh down the join using a timber batten and leave for a couple of hours.
Remove batten, check that the join is secure, and brush against the pile using a stiff broom or power brush for a perfect finish.
